Looking for a less-mess painting project for kids? Try this magical tree ring painting!
Marker painting is pure magic.
This is hands-down my favorite painting technique to use with little artists.
It not only is non-messy, but is a way to make painting accessible for most children at home. Many kids don’t have access to paint and brushes at home, but they do have access to washable markers and a q-tip.
Here’s how we used this amazing art technique to create colorful tree ring paintings.
Supplies:
- Heavy drawing paper (water color paper works best)
- Permanent marker
- Washable marker
- Paintbrush
- Dish of plain water
- Placemat (optional, but recommended)
Directions:
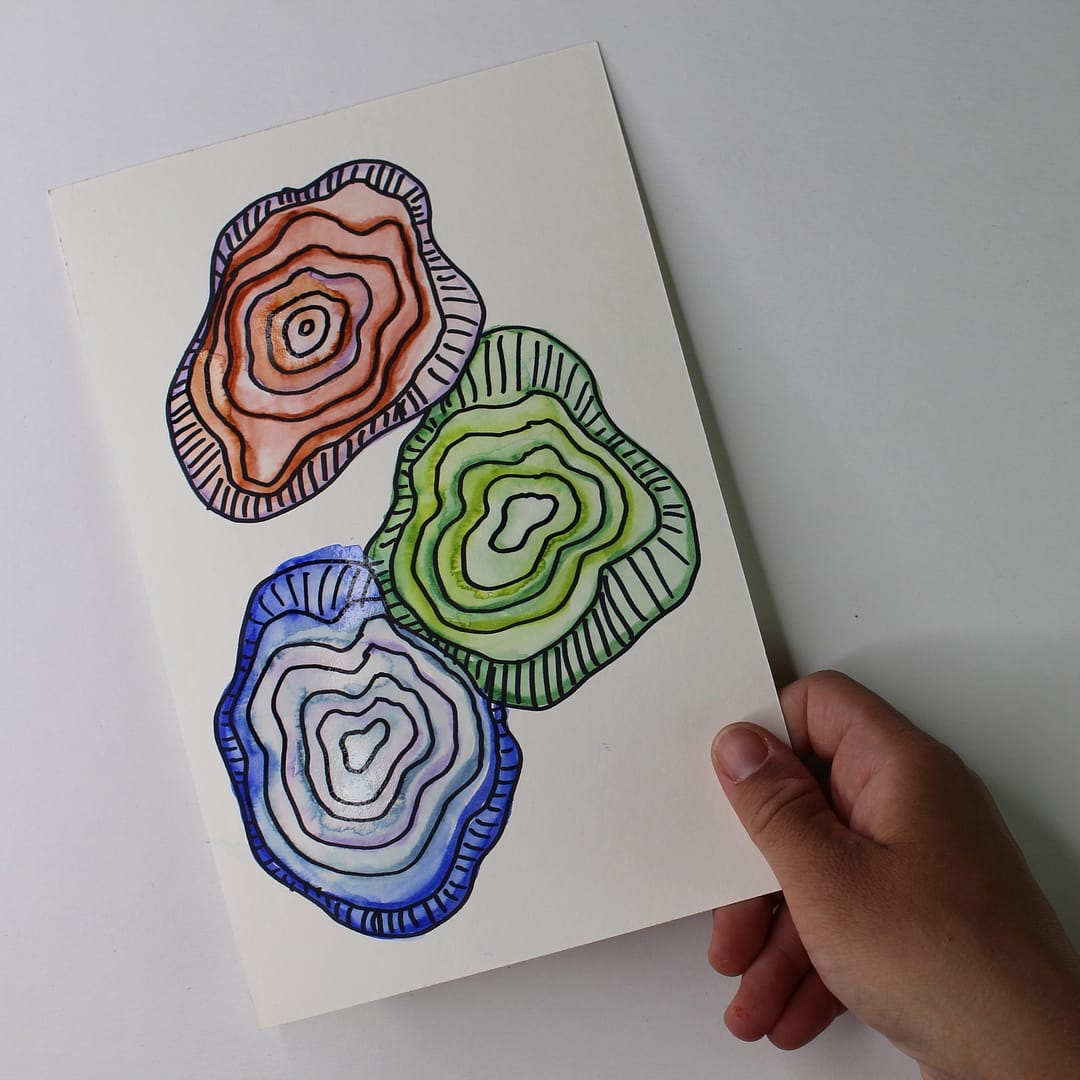
- Use a permanent marker to draw three wobbly circles onto your heavy paper. These will be your tree stumps.
- Draw a small circular shape in the center of each tree stump.
- Working from the inside to the outside of your stump, draw rings around the center circle.
- To add interest, you can add texture or pattern to the outer ring of each stump.
- Trace over each ring of your stump with washable marker. It works best to limit yourself to using just a few colors per stump. It is very important to only draw lines, rather than fully coloring it in.
- Dip a paintbrush into water and apply the water to your washable marker in a controlled way. The water will transform the marker into paint. A little bit of water goes a long way!


Looking for other projects that use the marker painting technique? Check out these other art projects for kids:
- Pumpkin Marker Paintings for Autumn
- Moon Marker Paintings to Celebrate the Full Moon
- Garden Marker Paintings inspired by “Up in the Garden, Down in the Dirt” by Kate Messner
- Bamboo Forest Marker Paintings Inspired by Qi Baishi
Happy Creating!
