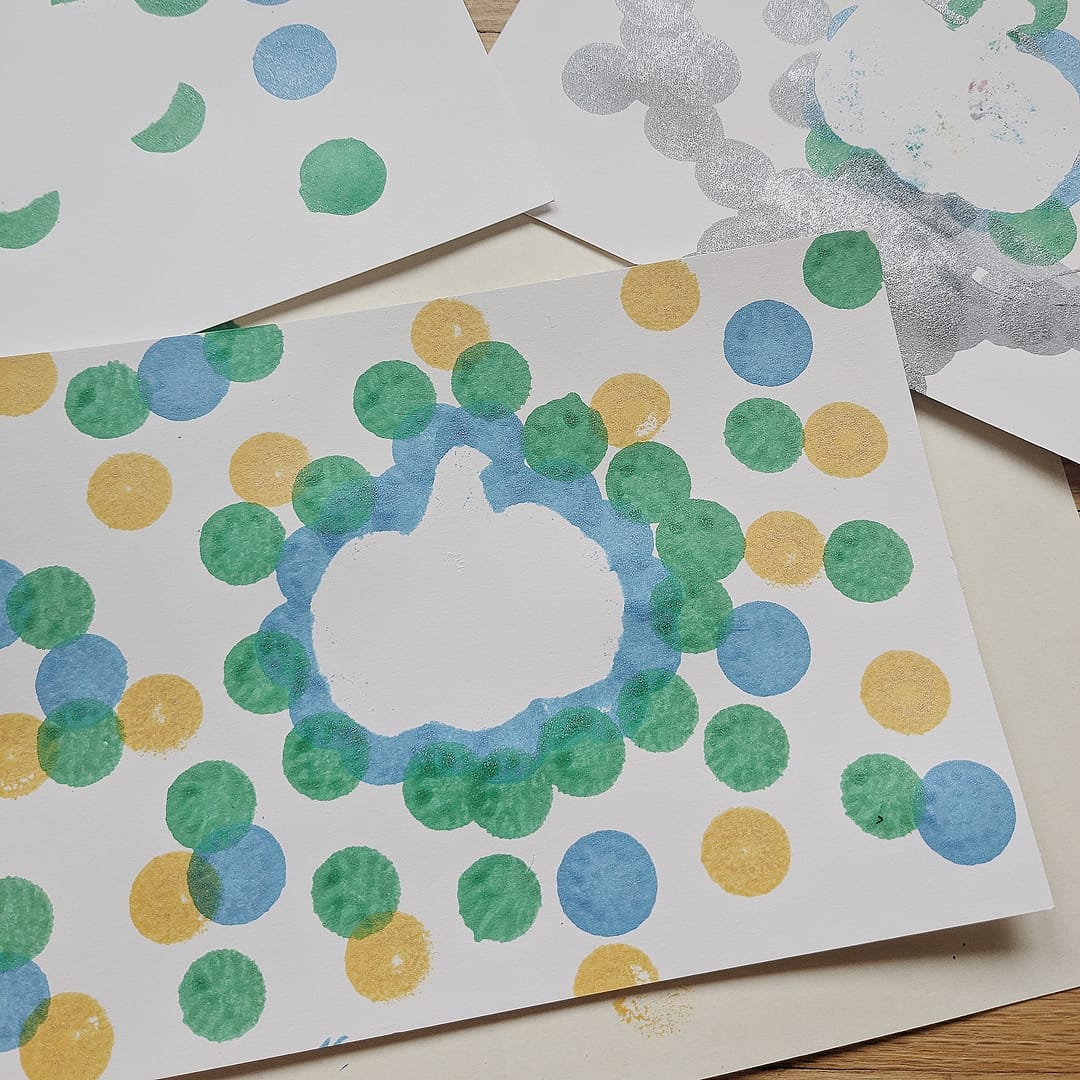
Embrace the beauty of negative space with these dot painting pumpkins for kids!
Looking to celebrate the beautiful fall season with your kids? Try out these dot painting pumpkins!
This painting project for kids captures the harvest spirit, is low-mess, low-prep, and teaches the concept of negative space.
Bonus? It is super accessible project for artists of a variety of ages and skill levels. I did this project with a 2 year old and a 5 year old. Both were highly engaged. Both had successful paintings.
Here’s how we made these darling fall paintings.
Supplies:
- Sheet of drawing paper
- Pumpkin template (download for free here or create one of your own)
- Scissors
- Masking tape or painter’s tape
- Dot paint markers
Directions:
- Cut out a pumpkin template.
- Use a loop of masking tape to attach the pumpkin template to the center of your drawing paper. Note that this shape will be removed once you are done painting, so it doesn’t have to be attached very tightly.
- Use your dot paint marker to paint around and on the pumpkin. Some paint should overlap this pumpkin template to create a negative shape.
- Remove your pumpkin template and the tape, revealing the shape on the paper created by negative space.


Looking for more pumpkin-themed activities? Check out this pumpkin nature study pack. It contains multiple printables for kindergarten through second grade.
Needing another fall art project? Check out this blog post tutorial on creating Cardboard Acorns. This fall craft for kids is simple and sustainably-made.
Happy creating, friends!