Create these adorable corn cob prints with your kids, all while reusing bubble wrap!
This art activity introduces children to the art technique of printmaking, the art element of value, and explores the concept of pressure.
All while reusing an item that typically ends up in the landfill – bubble wrap!
Here’s how we did this adorable autumn printmaking project.
Supplies:
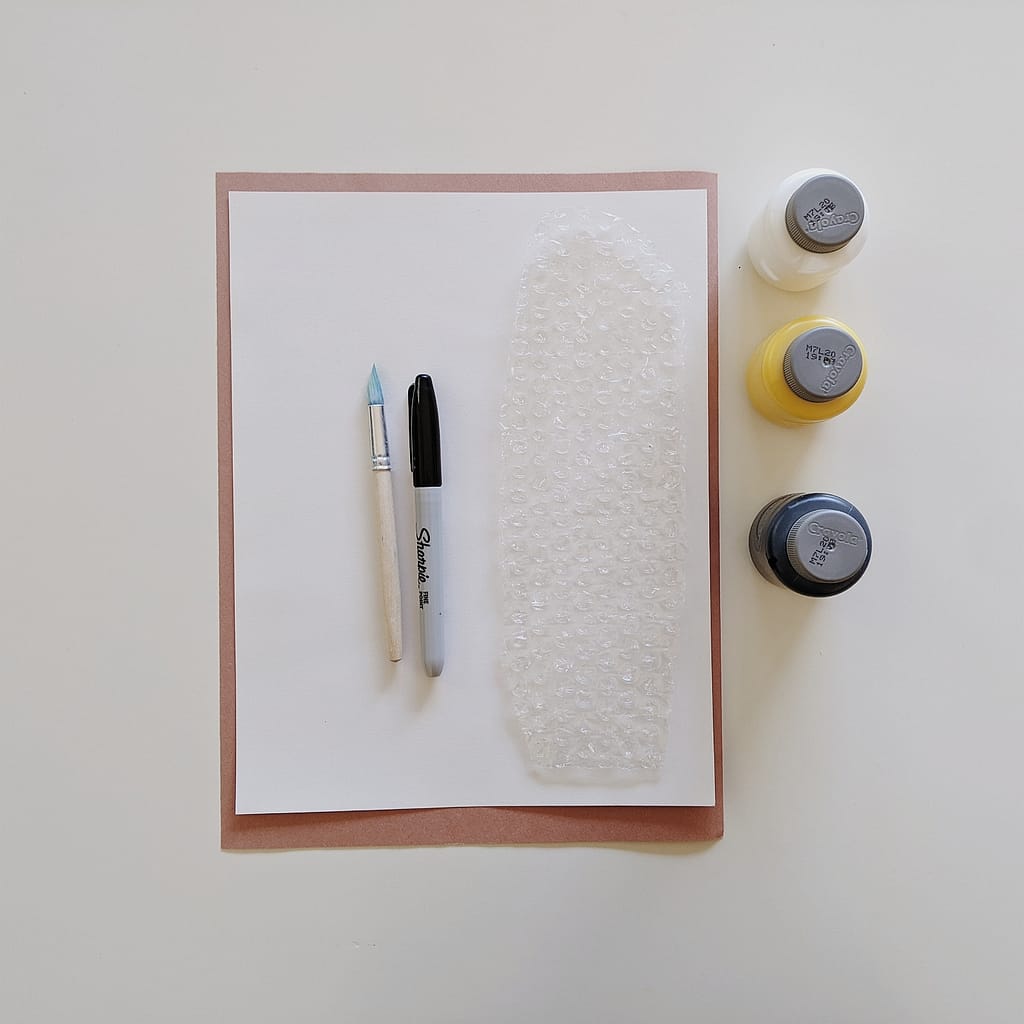
- Scissors
- Bubble wrap
- Paper
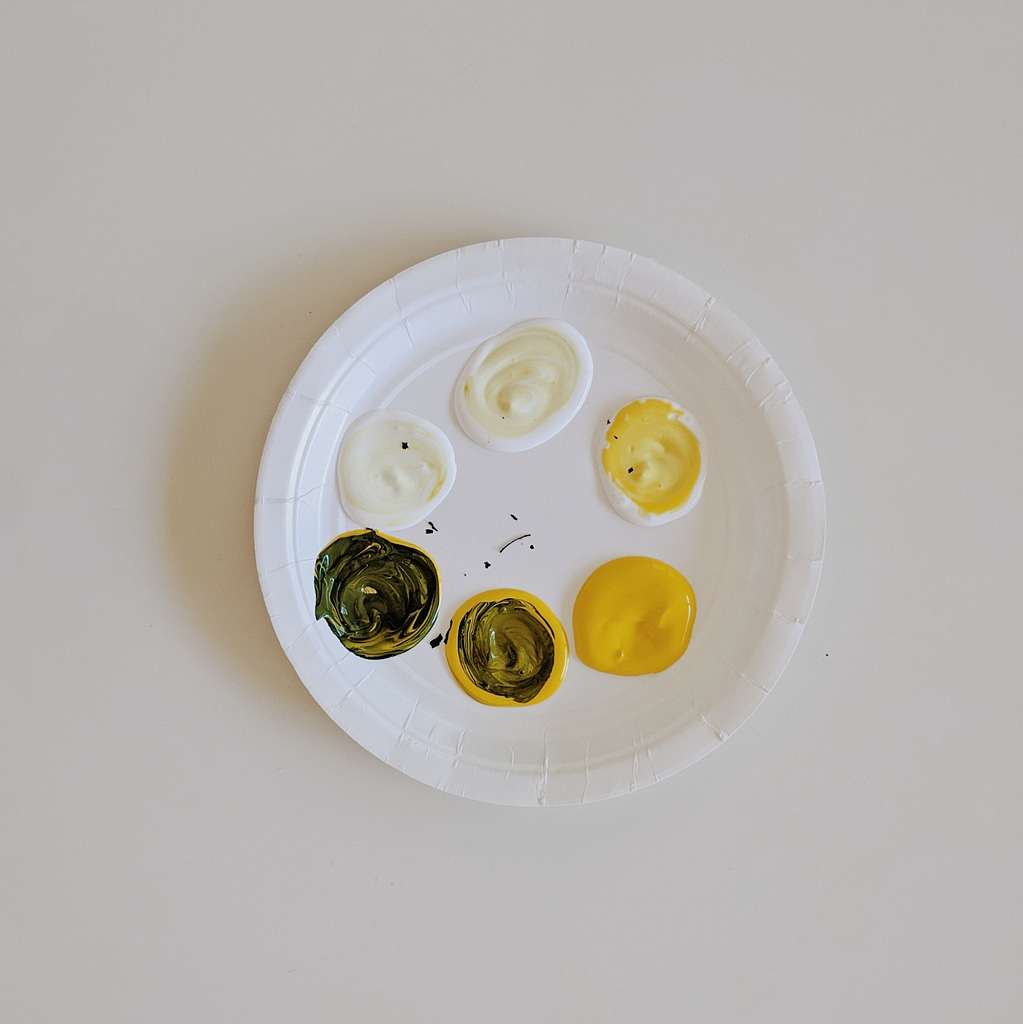
- Single paint color in a variety of tints and shades
- Paintbrush
- Black marker (optional, but recommended)
Directions:
- Use a pair of scissors to carefully cut a sheet of bubble wrap into a corncob shape.
- Using a paintbrush, apply different tints and shades of a single color onto the bubbles.
- Carefully lay your bubble wrap, paint side down, onto a piece of paper.
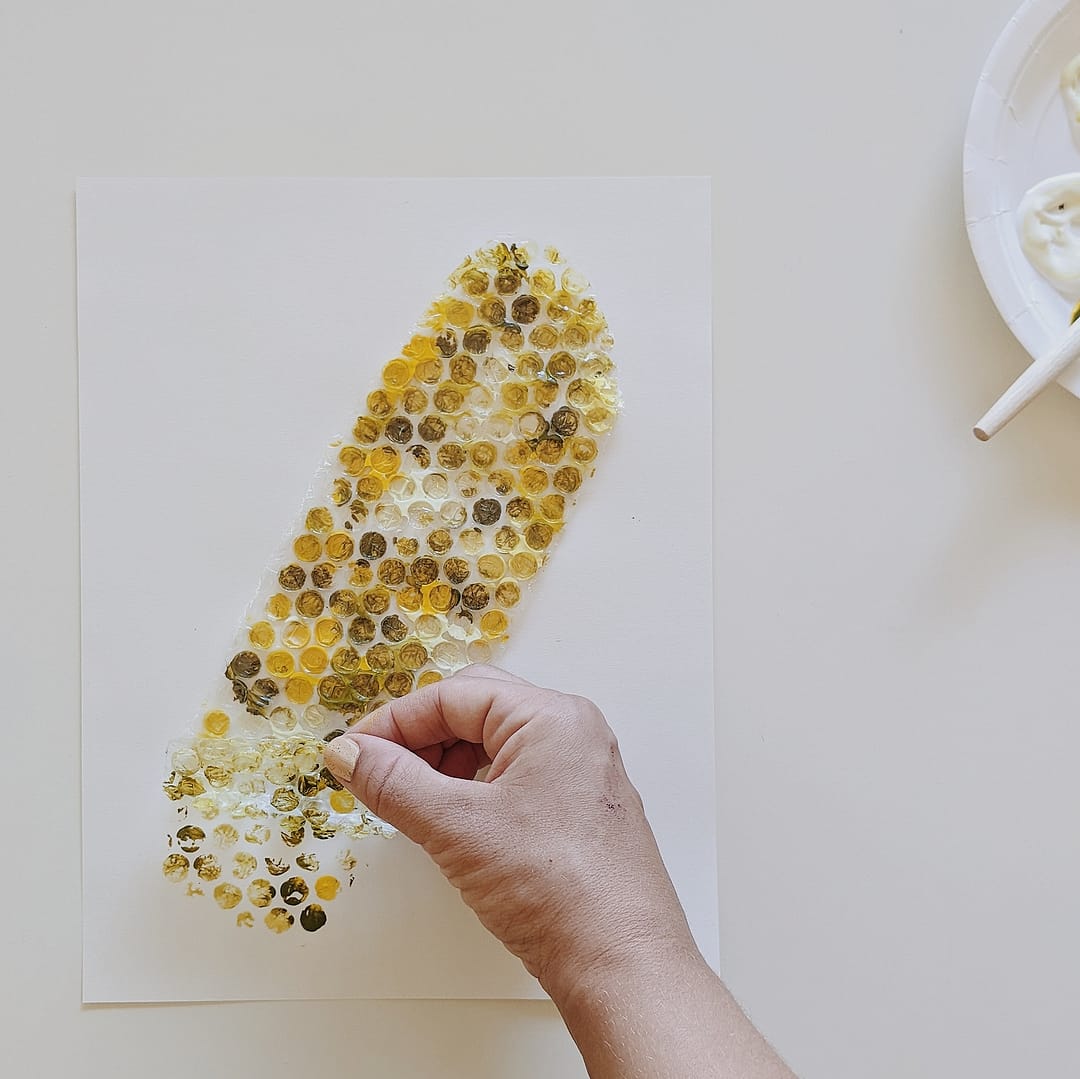
- Use your hand to press the bubble wrap onto the paper. Gently rub the bubble wrap to ensure the paint transfers.
- Carefully peel away the bubble wrap, leaving behind a print of a corn cob.
- Allow paint to dry. Then use a permanent marker to draw corn husks onto your print. You can also collage corn husks onto your artwork.


This art project is one of the ten learning activities included in the American Indian Activity Pack for Preschool and Kindergarten.
Needing another easy printmaking project for kids? Check out this blog post on creating monoprints with a cake pan.
Happy printing, friends!
